All examples shown below are written for use inside an ActionKit dashboard report. Simply paste the code into an ActionKit dashboard report and run it to see the results.
(There’s also an integrated “sampler” dashboard report that includes multiple samples in a single file, which you can download from GitHub.)
I’ve highlighted the API calls and the code that handles their results.
Fetch the Latest User
Let’s fetch the most-recent user and display their email address:
<p>
  <b>Latest User's Email:</b>
  <span id="latest-user">[LOADING...]</span>
</p>
<script>
  $.getScript( 'https://greenthumbsoftware.com/akjs/akapi-fetch.js' )
  .then( async function () {
    const latest_users = await akapi.get('user', { order_by: '-id', _limit: 1 } );
    $('#latest-user').text( latest_users.objects[0].email )
  } );
</script>
When you first run this dashboard, you’ll briefly see its default appearance:

Then an API request will be sent, asking for a list of users, ordered by ID in descending order (eg, starting with the highest values), and sending no more than one record.
A fraction of a second later, the response will arrive and the user’s email address will be inserted into the page.

This isn’t a particularly exciting example — we could have accomplished the same thing by using Django template calls to embed a query report in the dashboard — but it provides us with the foundation for more complicated behaviors.
User Search
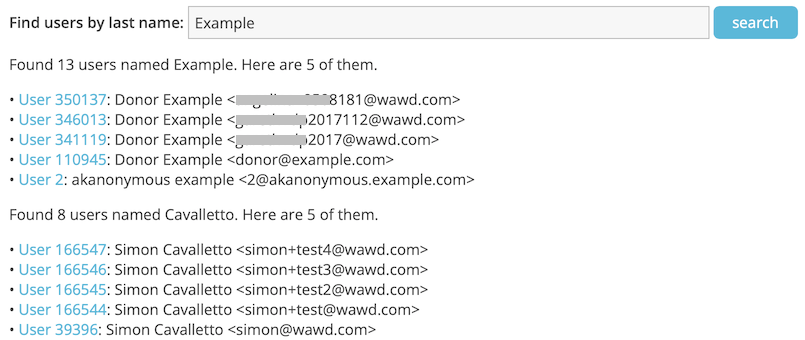
Next, let’s build a simple search form that lists users with a particular last name.
<form id="list-users">
<b>Find users by last name:</b>
<input type="text" name="last_name" placeholder="Smith or Jones">
<input type="submit" value="search">
</form>
<script>
$.getScript( 'https://greenthumbsoftware.com/akjs/akapi-fetch.js' )
.then( function () {
const search_form = $('#list-users');
const name_field = search_form.find('[name="last_name"]');
search_form.on('submit', async function(e) {
e.preventDefault();
const last_name = name_field.val();
const users = await akapi.get('user', { last_name: last_name, _limit: 5 } );
if ( ! users.objects.length ) {
search_form.after(
`<p> There are no users with the last name ${ last_name }. </p>`
);
return
}
const results = $(`<p> Found ${ users.meta.total_count } users named ${ last_name }</a>. </p>`).insertAfter( search_form );
if ( users.meta.total_count < users.objects.length ) {
results.append(`Here are ${ users.objects.length } of them.`)
}
for ( const user of users.objects ) {
results.after(
`<div> • <a target="_blank" href="/admin/core/user/${ user.id }/"> User ${ user.id }</a>: ${ user.first_name } ${ user.last_name } <${ user.email }> </div>`
);
}
} );
} );
</script>When you run this dashboard, you’re presented with a simple search form:

If you enter a surname and submit the form you’ll see some results listed:

You can search again to find additional results:
Create Users
Now that we’ve fetched some users, let’s turn our attention to creating them.
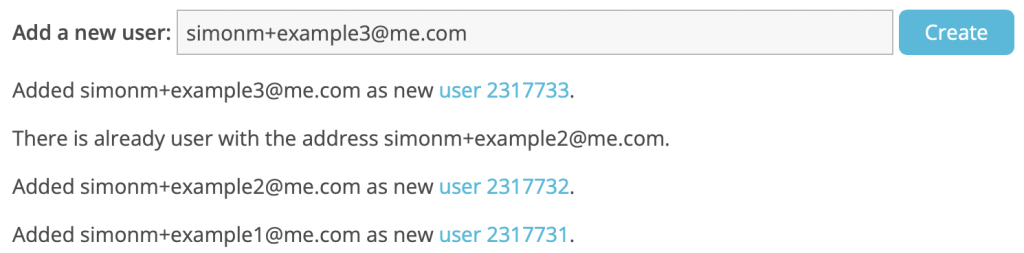
The only required field for users is an email address, which we can send in a POST request — but before we do that, we’ll check to see if a matching entry already exists:
<form id="add-user">
  <b>Add a new user:</b>
  <input type="text" name="email" placeholder="address@example.com">
  <input type="submit" value="Create">
</form>
<script>
  $.getScript( 'https://greenthumbsoftware.com/akjs/akapi-fetch.js' )
  .then( async function () {
    const adder_form = $('#add-user');
    const email_field = adder_form.find('[name="email"]');
    adder_form.on('submit', async function(e) {
      e.preventDefault();
      const email = email_field.val();
      const existing = await akapi.get('user', { email: email } );
      if ( existing.objects.length ) {
        output( `There is already user with the address ${ email }.` );
        return
      }
      const new_user = await akapi.post('user', { email: email } );
      const user_info = await akapi.get( new_user );
      output(
        `Added ${ email } as <a target="_blank" href="/admin/core/user/${ user_info.id }/">user ${ user_info.id }</a>.`
      );
    } );
    function output ( text ) {
      adder_form.after( `<p> ${ text } </p>` );
    }
  } );
</script>
When you run this dashboard, you’ll see a simple form that asks for an email address:

You can enter a value and submit the form to create a new user:

You can enter additional addresses to create more users, with feedback about each user created or found to already exist.
Update Actions
Now let’s use the API to do something we can’t do from within the regular admin interface: modify the source field for an existing action.
<form id="change-source">
  <b>Change action source:</b>
  <input type="number" name="action_id" placeholder="Action ID">
  <input type="text" name="source" placeholder="Source Code">
  <input type="submit" value="Change">
</form>
<style>
  #change-source input { width: 8em; }
</style>
<script>
  $.getScript( 'https://greenthumbsoftware.com/akjs/akapi-fetch.js' )
  .then( async function () {

    const update_form = $('#change-source');

    update_form.on('submit', async function(e) {
      e.preventDefault();
      const action_id = update_form.find('[name="action_id"]').val();
      const source = update_form.find('[name="source"]').val();

      const action = await akapi.get('action/' + action_id);

      const confirmed = window.confirm(`Change action ${ action_id } source from ${ action.source } to ${ source }?`);
      if ( ! confirmed ) {
        output( `Decided against changing source of action ${ action_id } from ${ action.source } to ${ source }.` );
        return;
      }

      const results = await akapi.patch( action.resource_uri, { source: source } );
      output( `Changed source of action ${ action_id } from ${ action.source } to ${ source }.` );
    } );

    function output ( text ) {
      update_form.after( `<p> ${ text } </p>` );
    }

  } );
</script>
When you run this dashboard, you’ll see a form with two fields:

After you enter values and submit the form, you’re asked to confirm the change:
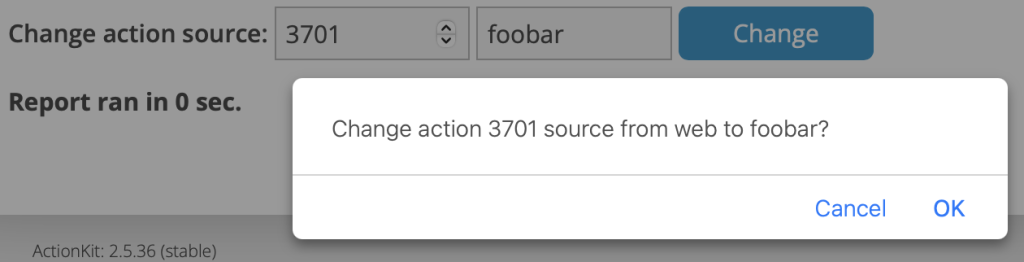
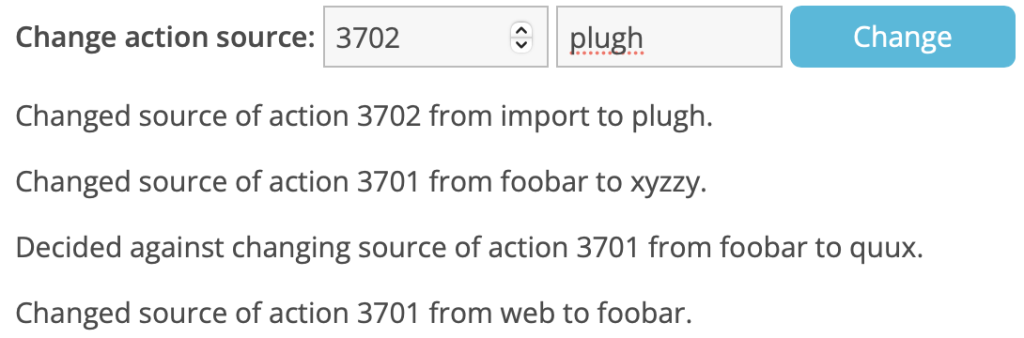
If you click OK, the change will be made and the screen will update to show what happened:

You can submit the form multiple times to update one or more actions, with feedback shown for each interaction:
Once More, With Exceptions
Let’s revisit the last example and show how we might handle exceptions, such as entering an invalid action ID or attempting to make changes for which we lack permission.
<form id="change-source">
  <b>Change action source:</b>
  <input type="number" name="action_id" placeholder="Action ID">
  <input type="text" name="source" placeholder="Source Code">
  <input type="submit" value="Change">
</form>
<style>
  #change-source input { width: 8em; }
</style>
<script>
  $.getScript( 'https://greenthumbsoftware.com/akjs/akapi-fetch.js' )
  .then( async function () {

    akapi.alert_on_failure = false;

    const update_form = $('#change-source')

    update_form.on('submit', async function(e) {
      e.preventDefault();
      const action_id = update_form.find('[name="action_id"]').val();
      const source = update_form.find('[name="source"]').val();

      var action;
      try {
        action = await akapi.get('action/' + action_id);
      } catch {
        output( `Can't find an action with ID ${ action_id }.` );
        return;
      };

      try {
        await akapi.patch( action.resource_uri, { source: source } );
      } catch {
        output( `Unable to change source of action ${ action_id } to ${ source }.` );
        return;
      };

      output( `Changed source of action ${ action_id } from ${ action.source } to ${ source }.` );
    } );

    function output ( text ) {
      update_form.after( `<p> ${ text } </p>` );
    }

  } );
</script>
The key changes from the last example are that we’re turning off the alert_on_failure feature and using try { } catch { } blocks to handle exceptions.
The form has the same appearance as before, but can provide feedback if an invalid action ID is entered.
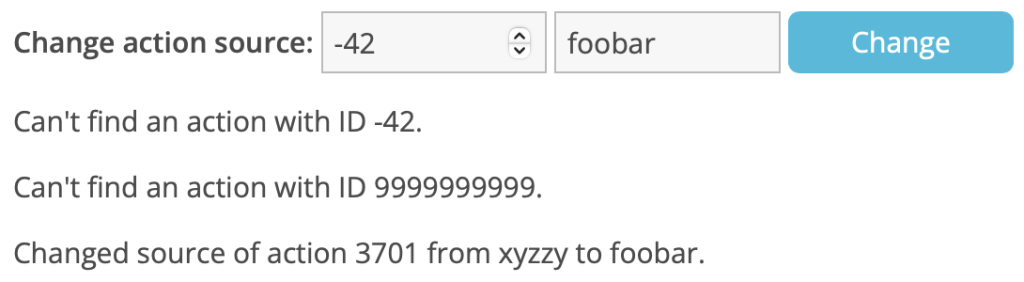
Another message will appear for users who have permission to view the form but don’t have permission to change action records.
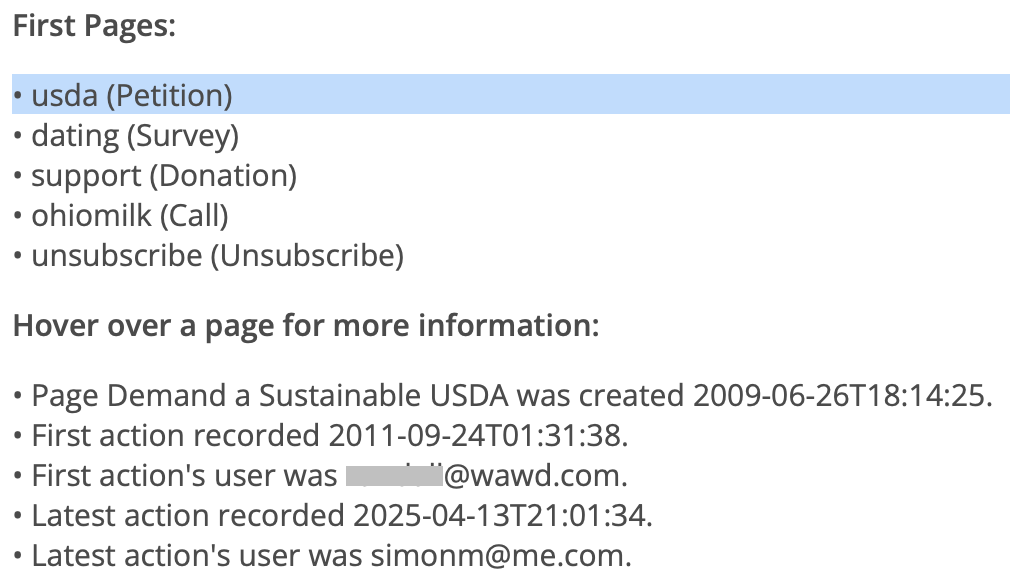
Interactive Retrieval
Let’s try a more complicated example, which loads a list of pages and then lets the user request additional information about the ones they are interested in.
<p> <b>First Pages:</b> </p>
<div id="some-pages">[LOADING...]</div>

<p> <b>Hover over a page for more information:</b> </p>
<div id="more-info"></div>

<style>
	#some-pages [data-page_id]:hover { background: #bdf }
</style>

<script>
  $.getScript( 'https://greenthumbsoftware.com/akjs/akapi-fetch.js' )
  .then( async function () {

    var page_list = await akapi.get('page', { order_by: 'id', _limit: 5 } );
    $('#some-pages').html('');
    for ( const page of page_list.objects ) {
      $('#some-pages').append( `<div data-page_id="${ page.id }"> • ${ page.name } (${ page.type }) </div>` )
    }
  } );

  $('#some-pages').on('mouseenter', '[data-page_id]', function () {
    const page_id = $( this ).data('page_id');
    const info_elt = $('#more-info');
    info_elt.show().text( '[LOADING...]' );
    retrieve_info( info_elt, page_id );
  } );
  $('#some-pages').on('mouseleave', '[data-page_id]', function () {
    $('#more-info').hide();
  } );

  async function retrieve_info ( info_elt, page_id ) {
    info_elt.text('');
    const output = function ( text ) {
      info_elt.append( `<div> • ${ text } </div>` );
    }
    const page = await akapi.get('page/' + page_id);
    output( `Page ${ page.title } was created ${ page.created_at }.` );
    const first_actions = await akapi.get( page.actions, { _limit: 1 } );
    if ( first_actions.objects.length == 0 ) {
      output( `No actions recorded.` );
      return;
    }
    const first_action = first_actions.objects[0];
    output( `First action recorded ${ first_action.created_at }.` );
    const user = await akapi.get( first_action.user );
    output( `First action's user was ${ user.email }.` );
    const recent_actions = await akapi.get( page.actions, { order_by: '-id', _limit: 1 } );
    const recent_action = recent_actions.objects[0];
    output( `Latest action recorded ${ recent_action.created_at }.` );
    const recent_user = await akapi.get( recent_action.user );
    output( `Latest action's user was ${ recent_user.email }.` );
  }
</script>
When you first load the page, you’ll briefly see a a “loading” message while the API request for a list of pages is sent:

After a fraction of a second, the results will arrive and information on the pages will be shown:

When the user hovers their mouse cursor over one of those entries, a series of API calls will be sent to the server and information will be displayed as it arrives:
Running SQL Queries
If we need to retrieve arbitrary data from within our interactive dashboard, we can run ad-hoc SQL queries.
<p>
  <b>Current Page Count:</b>
  <span id="page-count">[LOADING...]</span>
</p>
<script>
  $.getScript( 'https://greenthumbsoftware.com/akjs/akapi-fetch.js' )
  .then( async function () {

    var count = await akapi.post('report/run/sql/', {"query":"select count(*) from core_page"} )
    $('#page-count').text( count[0][0] )

  } );
</script>
When the dashboard first renders, we’ll see a placeholder while the API request is sent to the server:

A fraction of a second later, the results will be displayed:
